Account Settings
If you have administrator access, you can use the Account Settings page to configure settings for the Controlant Platform (SCM).
Note
This section is only accessible for users with Admin access to the Controlant Platform (SCM).
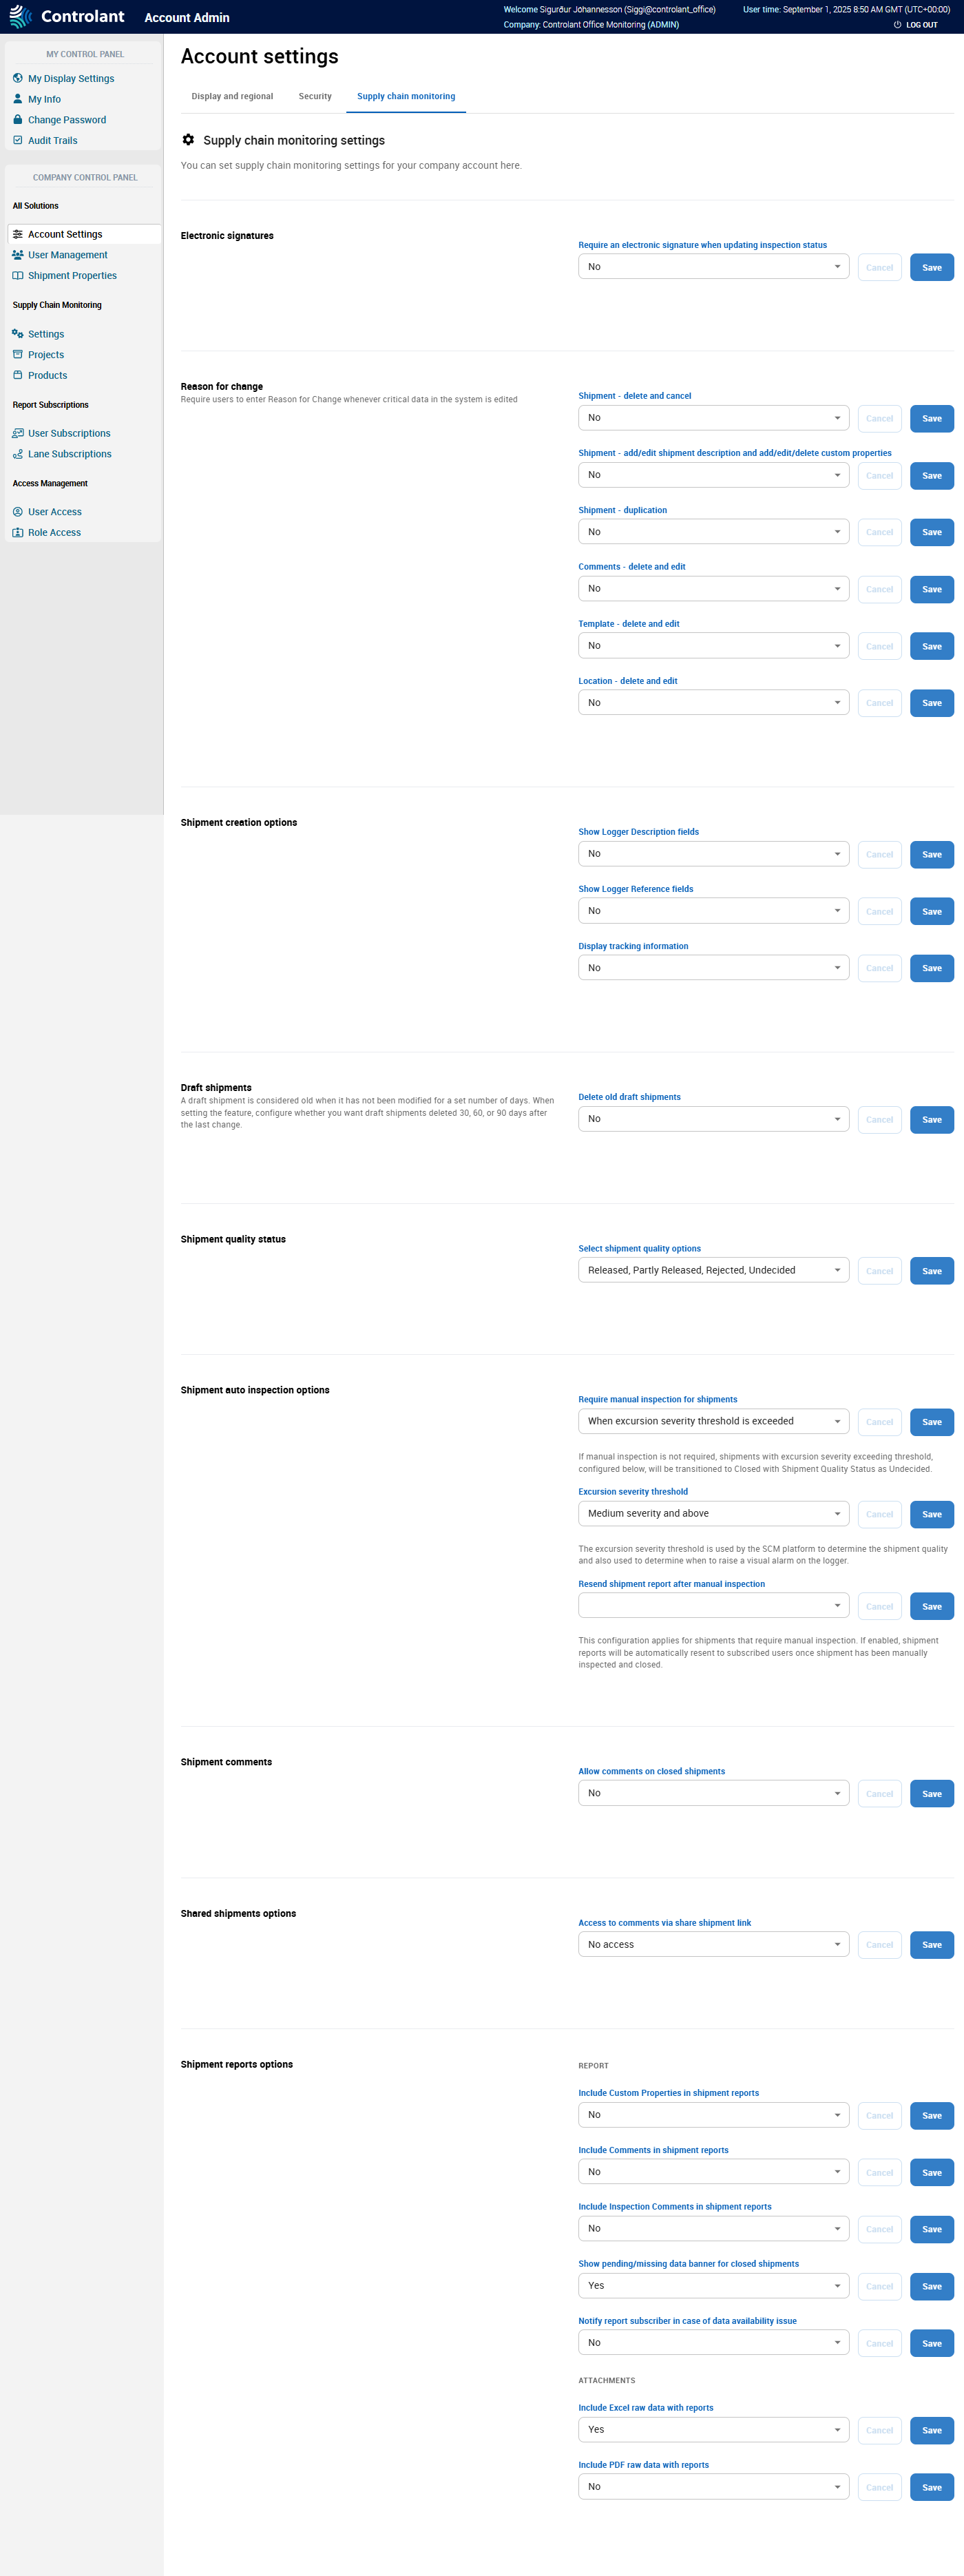
In the Account Admin, in the Company Control Panel menu, in the Supply Chain Monitoring area, click Account Settings.
The Account Settings page appears.
You can configure the following settings for Supply Chain Monitoring:
Note
This section is only accessible for users with Admin access to the Controlant Platform (SCM).
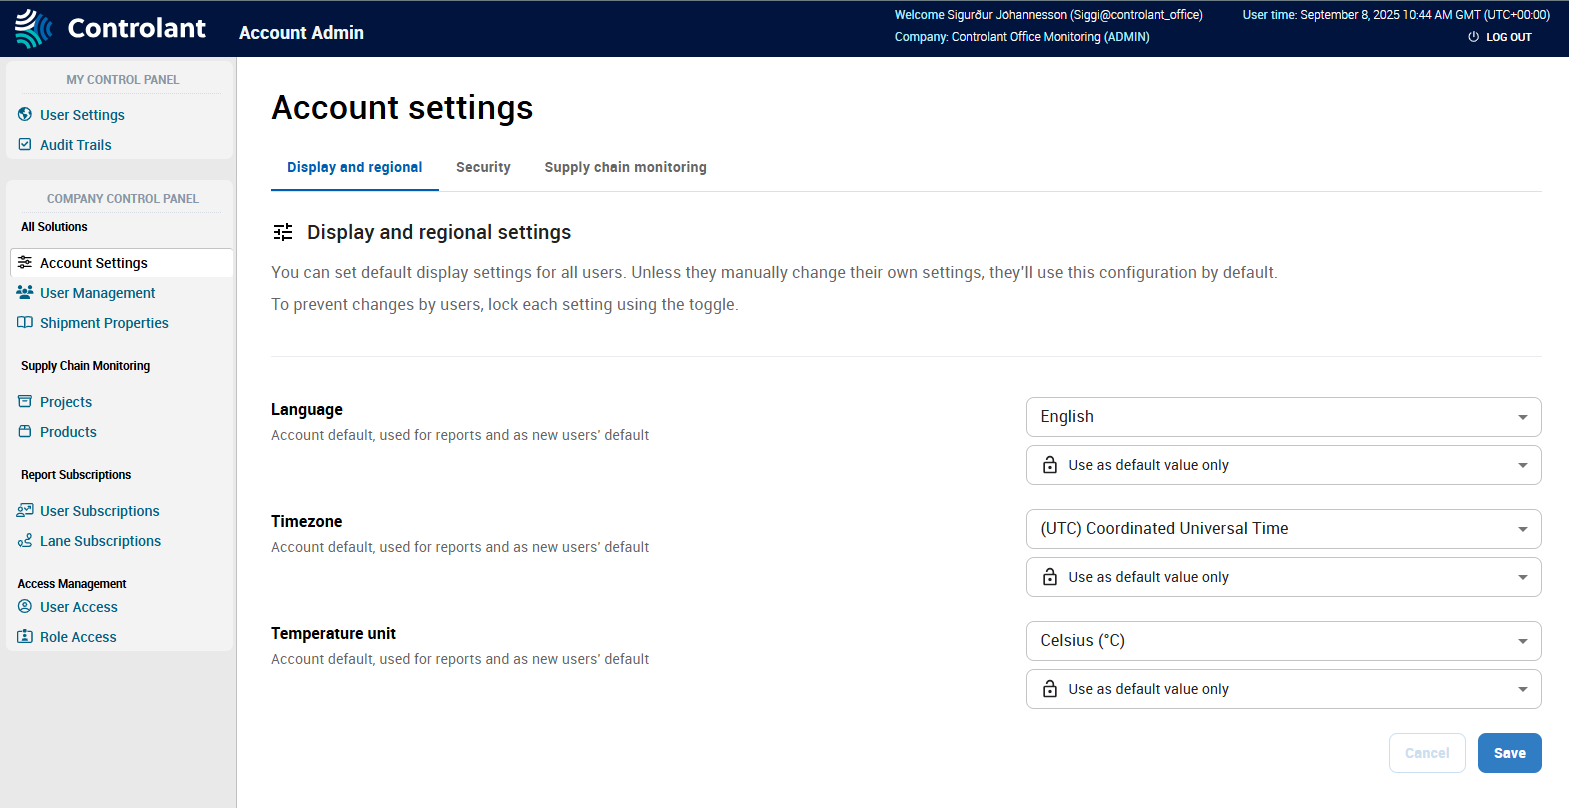
If you have administrator access, you can use the Display and regional tab to configure the following display and regional settings for the Controlant Platform (SCM):
interface language
time zone
unit of temperature
Note
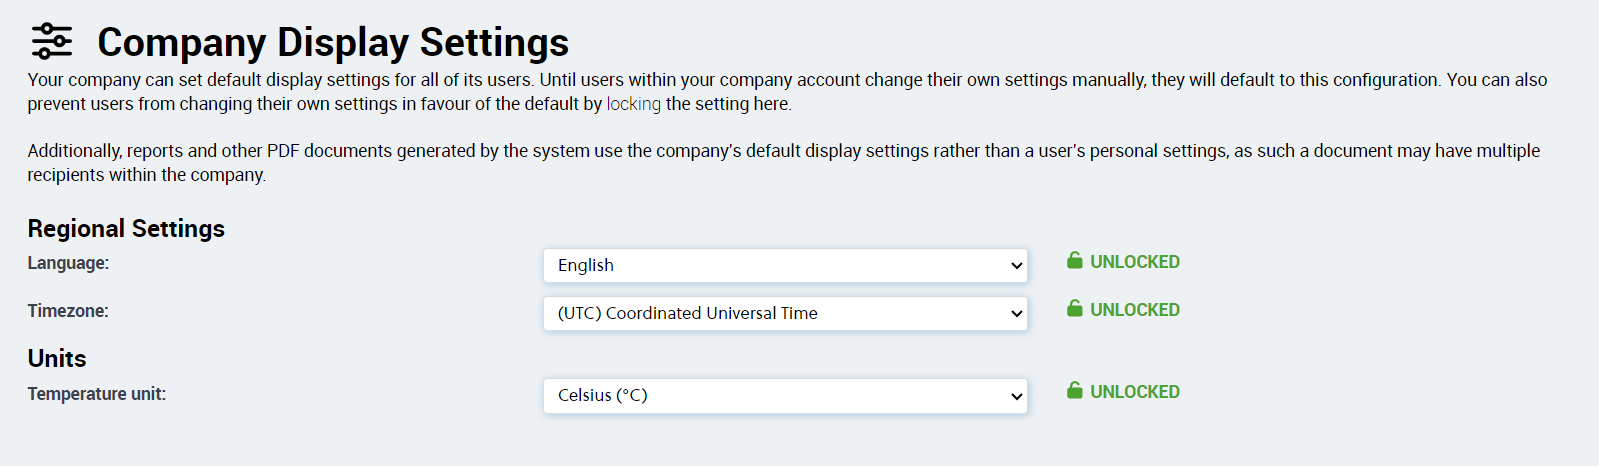
For each setting, you can also configure whether individual users can override these settings in My display settings.
To open the Display and regional tab, in the Account Admin menu, click Account Settings.
The Account Settings page appears, showing the Display and regional tab.
If you want to configure the language settings, do the following:

If you want to configure the language of the Controlant Platform (SCM), in the Language list, do one of the following:
To set the language to English, click English.
To set the language to Spanish, click Spanish.
If you want to configure whether individual users can override these settings, do one of the following:
To allow individual users can override these settings, click Use as default value only.
To prohibit individual users from overriding these settings, click Enforce this value for all users.
If you want to configure the time zone for the Controlant Platform (SCM), do the following:

If you want to configure the time zone you use, in the Timezone list, click the time zone you want to use.
If you want to configure whether individual users can override these settings, do one of the following:
To allow individual users can override these settings, click Use as default value only.
To prohibit individual users from overriding these settings, click Enforce this value for all users.
If you want to configure the unit of temperature for the Controlant Platform (SCM), do the following:

If you want to configure the unit of temperature you use, in the Temperature list, do one of the following:
To use Celsius, click Celsius.
To use Fahrenheit, click Fahrenheit.
If you want to configure whether individual users can override these settings, do one of the following:
To allow individual users can override these settings, click Use as default value only.
To prohibit individual users from overriding these settings, click Enforce this value for all users.
Click Save.
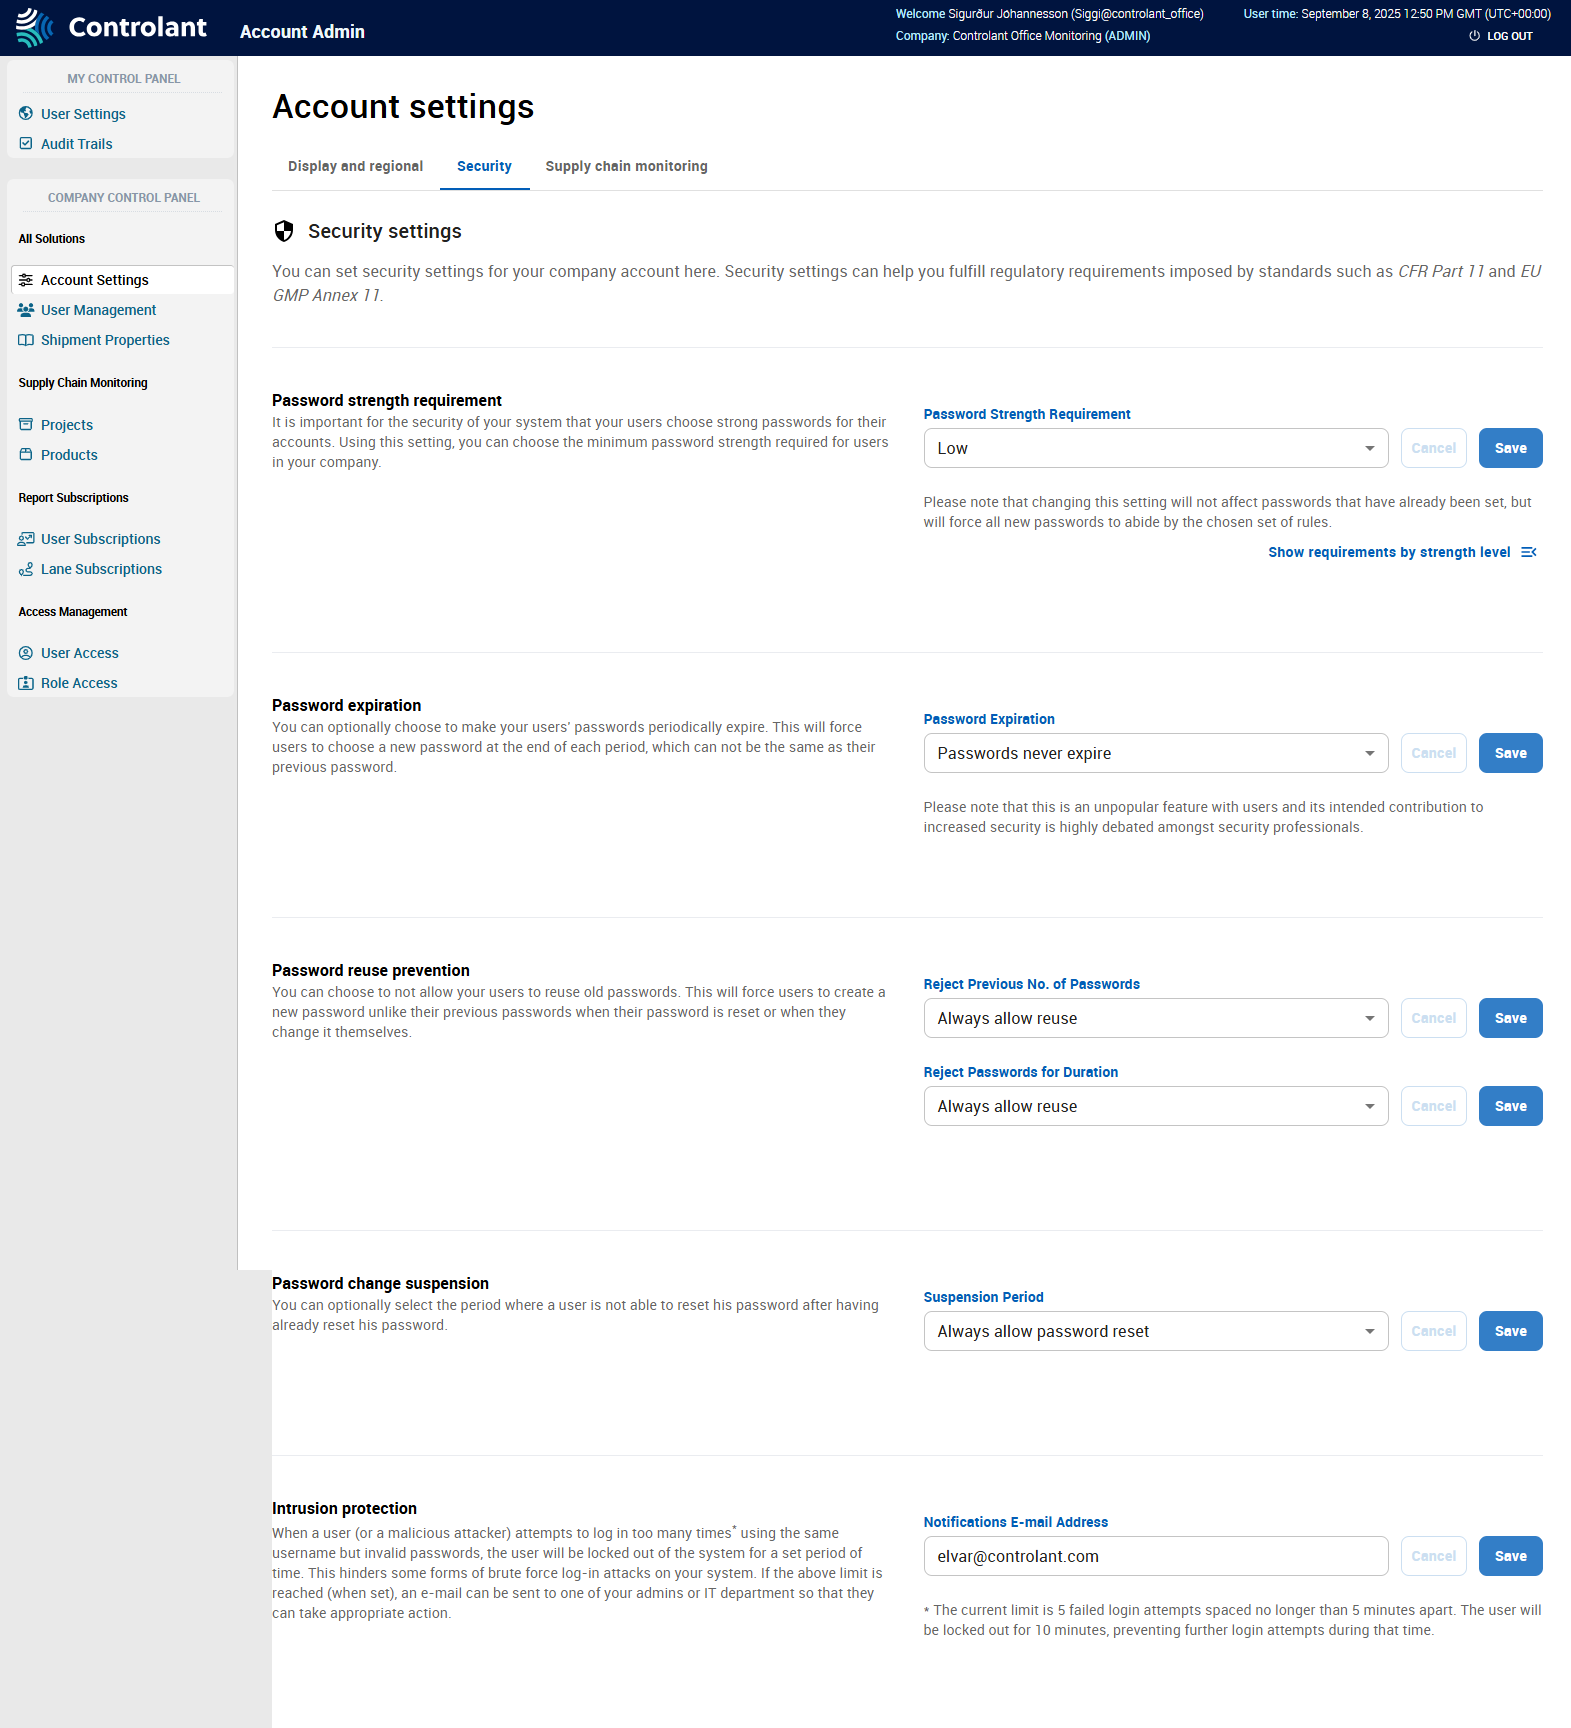
If you have administrator access, you can use the Security tab to configure the following security settings for the Controlant Platform (SCM):
Note
This section is only accessible for users with Admin access to the Controlant Platform (SCM).
password strength
password expiration period
password reuse
password change suspension
Intrusion protection
Note
The password security settings do not apply if you have Single sign-on setup.
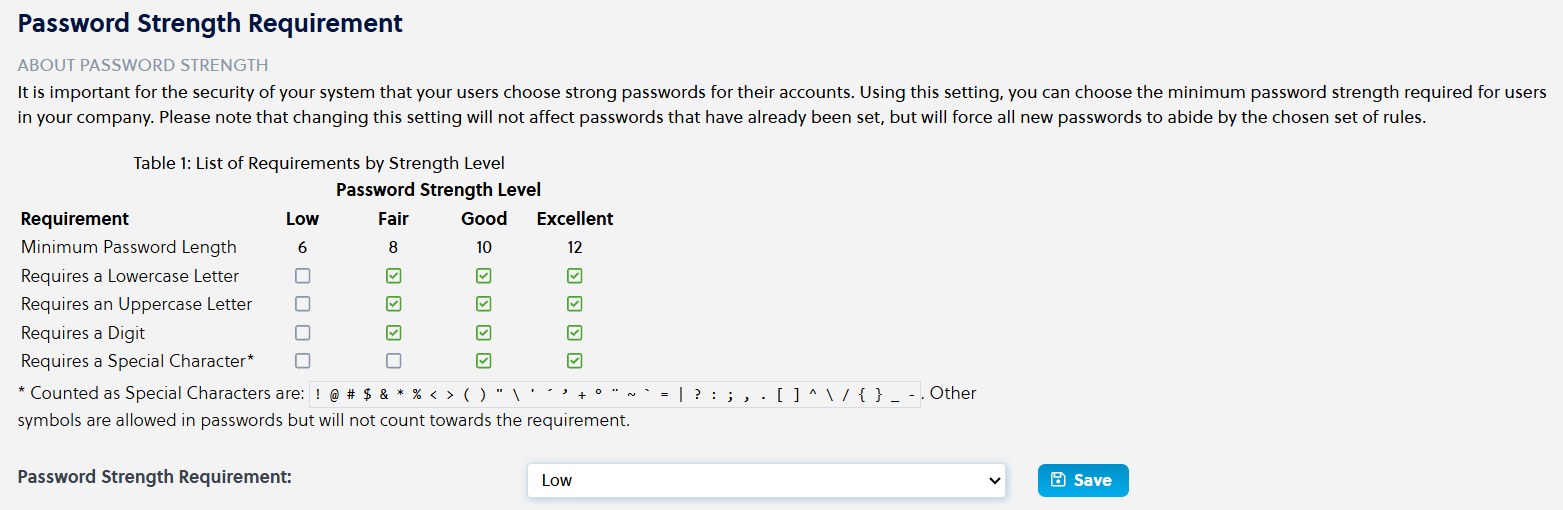
You can configure how strong passwords need to be. The Controlant Platform (SCM) will not accept passwords that are weaker than what you have configured.
Note
Changing this setting will not affect passwords that have already been set, but will force all new passwords to abide by the chosen set of rules.
Strength level | Description |
|---|---|
Low | Low strength passwords will be accepted:
|
Fair | Fair strength passwords will be accepted:
|
Good | Good strength passwords will be accepted:
|
Excellent | Excellent strength passwords will be accepted:
|
Configuring password strength requirement
In the Password Strength Requirement area, in the Password Strength Requirement list, click the password strength you want to apply:
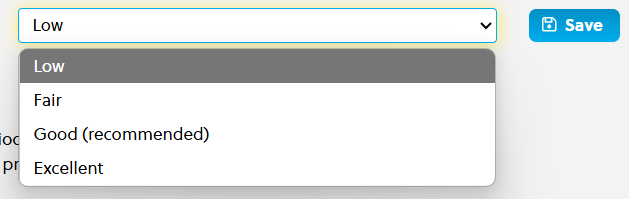
Low
Fair
Good (recommended)
Excellent
Click Save.
The password strength requirement is changed for the Controlant Platform (SCM).
Note
Changing this setting will not affect passwords that have already been set, but will force all new passwords to abide by the chosen set of rules.
You can configure Controlant Platform (SCM) to make your users' passwords periodically expire. This will force users to choose a new password at the end of each period, and the new password can not be the same as their previous password.
Note
This is an unpopular feature with users and its intended contribution to increased security is highly debated amongst security professionals.
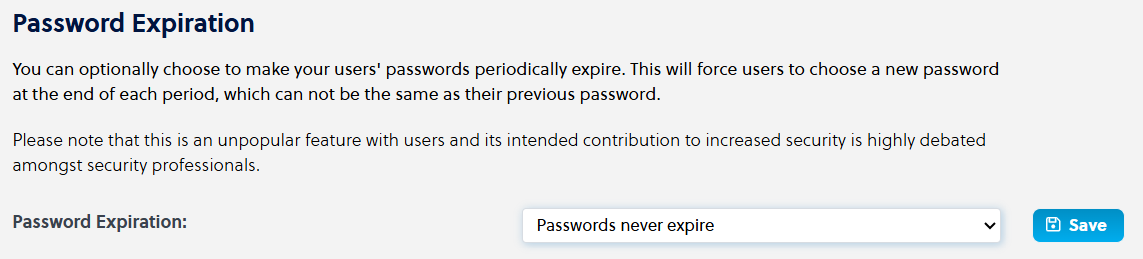
Configuring password expiration
In the Password Expiration area, in the Password Expiration list, click the password expiration setting you want to set:
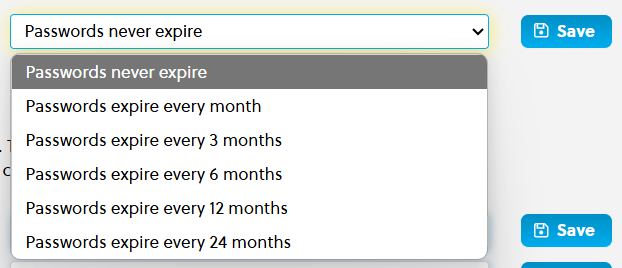
Passwords never expire
Passwords expire every month
Passwords expire every 3 months
Passwords expire every 6 months
Passwords expire every 12 months
Passwords expire every 24 months
Click Save.
The password expiration is changed for the Controlant Platform (SCM).
You can configure the platform to not allow your users to reuse old passwords. This will force users to create a new password unlike their previous passwords when their password is reset or when they change it themselves. You can configure this to apply to a specific number of previous passwords, or for a specific period.
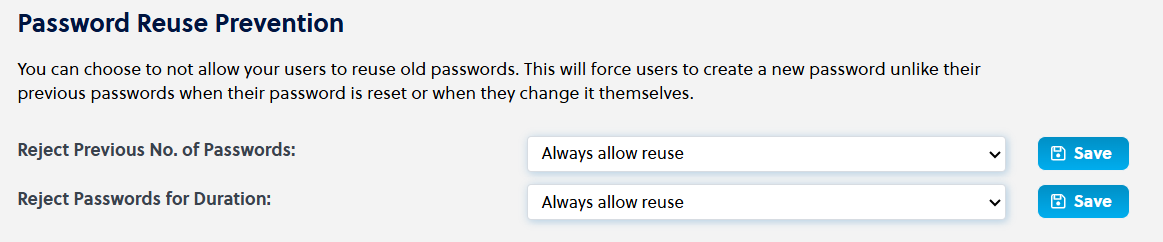
Configuring password expiration
In the Password Reuse Prevention area, in the Password Reuse Prevention list, do one or more of the following:
To configure the number of previous passwords to reject, click the password reuse prevention setting you want to set:
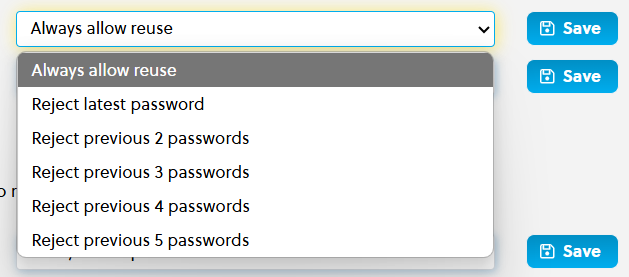
Always allow reuse
Reject latest password
Reject previous 2 passwords
Reject previous 3 passwords
Reject previous 4 passwords
Reject previous 5 passwords
To configure the amount of time you want to pass before a password can be reused, click the password reuse prevention setting you want to set:
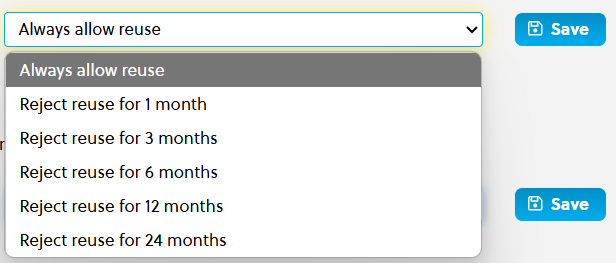
Always allow reuse
Reject reuse for 1 month
Reject reuse for 3 months
Reject reuse for 6 months
Reject reuse for 12 months
Reject reuse for 24 months
Click Save.
The password reuse prevention setting is changed for the Controlant Platform (SCM).
You can configure a waiting period after a password reset where a user is not allowed to reset the password.

Configuring password change suspension
In the Password Change Suspension area, in the Password Change Suspension list, click the password password change suspension setting you want to set:
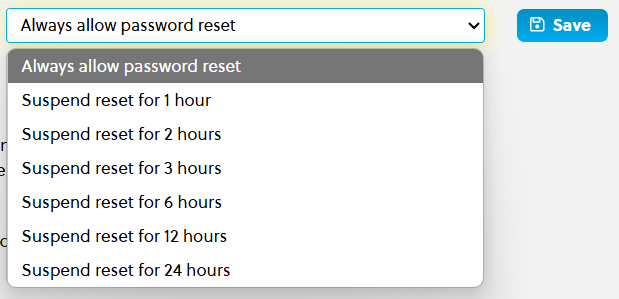
Always allow password reset
Suspend reset for 1 hour
Suspend reset for 2 hours
Suspend reset for 3 hours
Suspend reset for 6 hours
Suspend reset for 12 hours
Suspend reset for 24 hours
Click Save.
The password change suspension setting is changed for the Controlant Platform (SCM).
You can configure a waiting period after a password reset where a user is not allowed to reset the password.
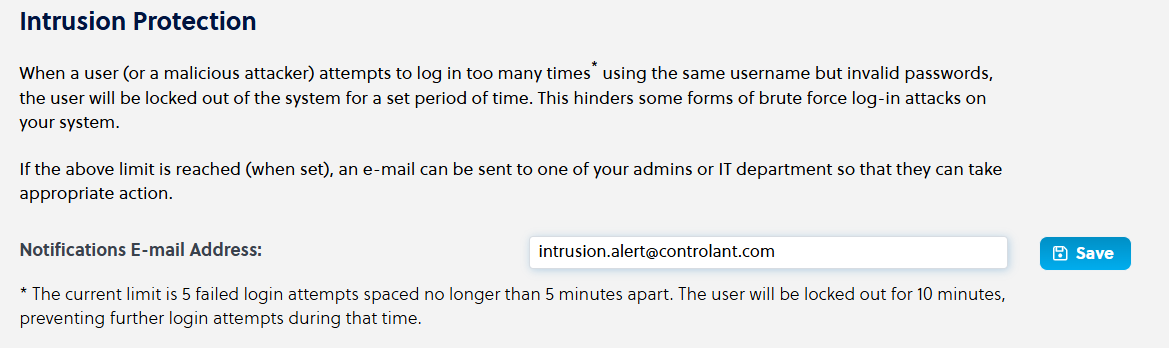
Configuring intrusion protection
In the Intrusion Protection area, in the Notifications E-mail Address box, type the email address to which you want to send notifications of system intrusion attempts.
Click Save.
The intrusion protection email setting is changed for the Controlant Platform (SCM).
Note
This section is only accessible for users with Admin access to the Controlant Platform (SCM).
You can use the Supply chain monitoring tab to configure settings for the Controlant Platform (SCM).
In the Account Admin, in the Company Control Panel menu, in the All Solutions area, click Account Settings. The Settings page appears. Click Supply chain monitoring. The Supply chain monitoring tab appears.
You can configure the following settings for Supply Chain Monitoring:
You can configure whether you want to require an electronic signature when updating the inspection status of shipments.
This means the user is required to re-authenticate, and provide a reason for the operation performed as a reason for change.
Note
Re-authentication will be done using the method that was used to log in; via username and password, or via Single Sign-On.

Configuring Electronic Signatures
In the Settings page, in the Electronic Signatures area, do one of the following:
If you want to require users to provide an electronic signature when updating the inspection status of shipments, in the Require an electronic signature when updating inspection status list, click Yes.
If you do not want to require users to provide an electronic signature when updating the inspection status of shipments, in the Require an electronic signature when updating inspection status list, click No.
Click Save.
You can configure whether you want to require an electronic signature when updating the inspection status of shipments. This means the user is required to re-enter the password and type a reason the operation performed.
Note
Having an explanation for the reason a change was made to a shipment can be useful for traceability and compliance.
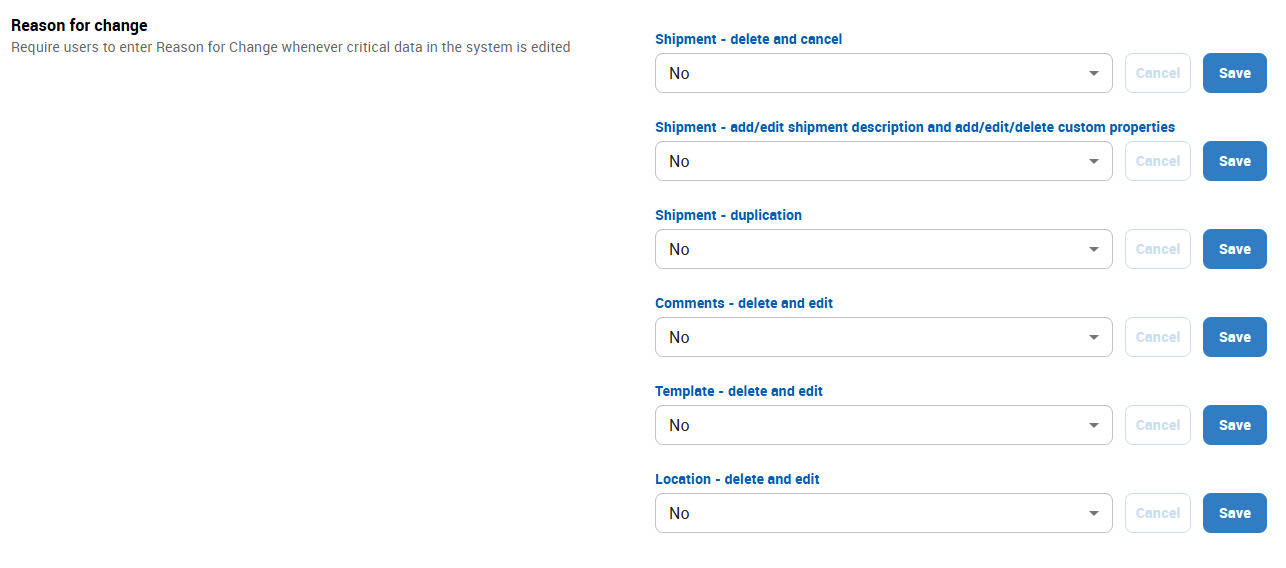
Configuring Reason for Change
In the Settings area, in the Reason for Change area, do one or more of the following:
To configure whether to require users to provide a reason for the change when deleting or canceling a shipment, do one of the following:
If you want to require users to provide a reason for the change, in the Shipment - delete and cancel list, click Yes.
If you do not want to require users to provide a reason for the change, in the Shipment - delete and cancel list, click No.
Click Save.
To configure whether to require users to provide a reason for the change when adding/editing shipment descriptions or adding/editing/deleting custom properties for a shipment, do one of the following:
If you want to require users to provide a reason for the change, in the Shipment - add/edit shipment description and add/edit/delete custom properties list, click Yes.
If you do not want to require users to provide a reason for the change, in the Shipment - add/edit shipment description and add/edit/delete custom properties list, click No.
Click Save.
To configure whether to require users to provide a reason for the change when duplicating a shipment, do one of the following:
If you want to require users to provide a reason for the change, in the Shipment - duplication list, click Yes.
If you do not want to require users to provide a reason for the change, in the Shipment - duplication list, click No.
Click Save.
To configure whether to require users to provide a reason for the change when they delete or edit comments, do one of the following:
If you want to require users to provide a reason for the change, in the Comments - delete and edit list, click Yes.
If you do not want to require users to provide a reason for the change, in the Comments - delete and edit list, click No.
Click Save.
To configure whether to require users to provide a reason for the change when deleting or editing templates, do one of the following:
If you want to require users to provide a reason for the change, in the Template - delete and edit list, click Yes.
If you do not want to require users to provide a reason for the change, in the Template - delete and edit list, click No.
Click Save.
To configure whether to require users to provide a reason for the change when deleting or editing locations, do one of the following:
If you want to require users to provide a reason for the change, in the Location - delete and edit list, click Yes.
If you do not want to require users to provide a reason for the change, in the Location - delete and edit list, click No.
Click Save.
You can configure whether you want to include the following information when creating a shipment:
device description fields
device reference fields
tracking information

Configuring Shipment Creation Options
In the Settings area, in the Shipment Creation Options area, do one or more of the following:
To configure whether to allow users to provide an optional device description when creating a shipment, do one of the following:
Note
You can use the device description to describe the location of a device in a shipment, e.g. pallet number, placement within a container, etc. The information entered into the Show Logger Description text box is available in Share Shipment, as well as on the device placement sheet.
If you want to allow users to provide a device description, in the Show Logger Description fields list, click Yes.
If you do not want to allow users to provide a device description, in the Show Logger Description fields list, click No.
Click Save.
To configure whether to allow users to provide an optional device reference when creating a shipment, do one of the following:
Note
You can use the device reference to describe the location of a device in a shipment, e.g. pallet number, placement within a container, etc. The information entered into the Show Logger Description text box is available in Share Shipment, as well as on the device placement sheet.
If you want to allow users to provide a device description, in the Show Logger Reference fields list, click Yes.
If you do not want to allow users to provide a device description, in the Show Logger Reference fields list, click No.
Click Save.
To configure whether to include display tracking information when creating a shipment, do one of the following:
If you want to include display tracking information, in the Display tracking information list, click Yes.
If you do not want to include display tracking information, in the Display tracking information list, click No.
Click Save.
You can configure whether you want the system to delete draft shipments if they have not been modified for a set number of days.

Note
A draft shipment is considered old when it has not been modified for a set number of days. You can configure the system to delete draft shipments 30, 60, or 90 days after the last change.
Configuring Draft Shipments
In the Settings page, in the Draft Shipments area, to configure whether to want the system to delete draft shipments after a set amount of time, do one of the following:
If you do not want the system to delete draft shipments after a set amount of time, in the Delete old draft shipments list, click No.
If you want the system to delete draft shipments if they have not been modified for 30 days, in the Delete old draft shipments list, click After 30 days.
If you want the system to delete draft shipments if they have not been modified for 60 days, in the Delete old draft shipments list, click After 60 days.
If you want the system to delete draft shipments if they have not been modified for 90 days, in the Delete old draft shipments list, click After 90 days.
Click Save.
You can configure the shipment quality options to use in the Controlant Platform (SCM). You can select between two sets of quality statuses:
Item | Description |
|---|---|
Good, Bad, Undecided |
|
Released, Partly Released, Rejected, Undecided |
|
Note
Updating the quality status configuration will apply to all shipments inspected after the changes. Updating the configuration will not impact closed shipments.

Configuring Shipment Quality Status
In the Settings page, in the Shipment Quality Status area, to configure which set of quality statuses you want the system to use, do one of the following:
If want the system to use three quality statuses, in the Select shipment quality options list, click Good, Bad, Undecided.
If want the system to use four quality statuses, in the Select shipment quality options list, click Released, Partly Released, Rejected, Undecided.
Click Save.
You can configure options for auto inspection of shipments. You can configure the following:
Whether to require manual inspection for shipments:
when excursion severity threshold is exceeded
never
Note
If you set this option to Never, shipments with excursion severity exceeding the threshold configured below, will be transitioned to Closed status with Shipment Quality Status as Undecided.
excursion severity threshold
Excursion severity threshold is used by the Controlant Platform (SCM) to determine shipment quality and when to raise a visual alarm on the device.
low severity and above
medium severity and above
high severity
Resend shipment report after manual inspection
Configures whether to automatically resend the shipment quality report for shipments that require manual inspection after manual inspection has been performed and the shipment closed. You can select the following options:
resend
do not resend
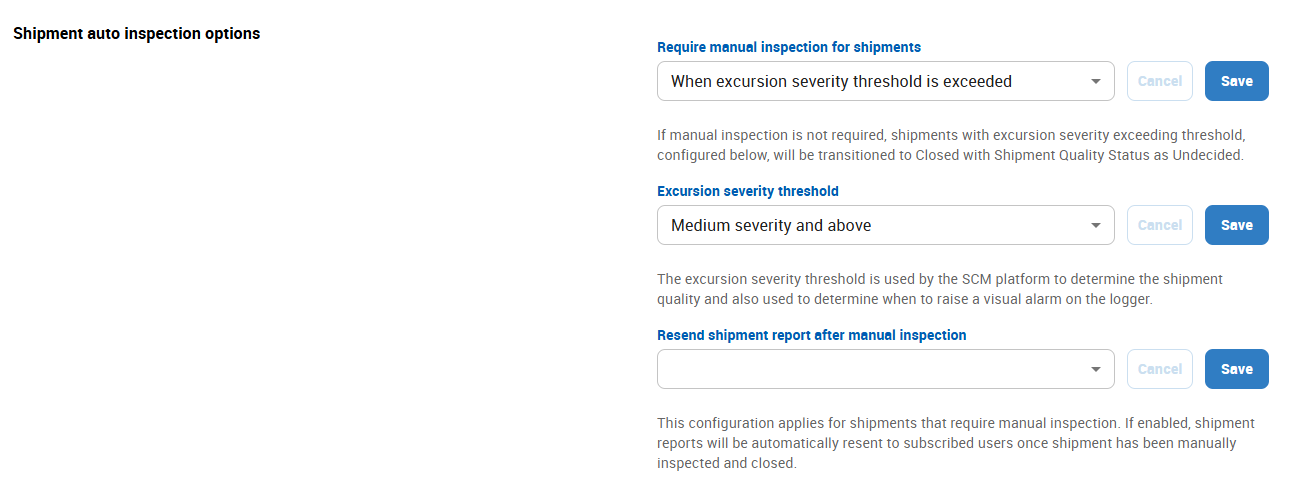
Configuring Shipment Auto Inspection Options
In the Settings area, in the Shipment Auto Inspection Options area, do one or more of the following:
To configure when to require manual inspection of shipments, do one of the following:
If you want to require manual inspection of shipments users when excursion severity threshold is exceeded, in the Require manual inspection for shipments list, click When excursion severity threshold is exceeded.
If you do not want to require users to provide a reason for the change, in the Require manual inspection for shipments list, click Never.
Click Save.
To configure the excursion severity threshold for shipments, do one of the following:
If you want to set the excursion severity threshold to low, in the Excursion severity threshold list, click Low severity and above.
If you want to set the excursion severity threshold to medium, in the Excursion severity threshold list, click Medium severity and above.
If you want to set the excursion severity threshold to high, in the Excursion severity threshold list, click High severity.
Click Save.
To configure whether to resend shipment reports after shipments that required manual inspection have been inspected and closed, do one of the following:
If you want to resend shipment reports after manual inspection, in the Resend shipment report after manual inspection list, click Yes.
If you do not want to resend shipment reports after manual inspection, in the Resend shipment report after manual inspection list, click No.
Click Save.
You can configure whether to allow comments on closed shipments.
Note
Users will also be able to add attachments to the comments.

Configuring Shipments comments
In the Settings page, in the Shipment comment area, to configure whether to include access to comments when sharing shipments, do one of the following:
If you want to allow users to add comments and attachments on closed shipments, in the Shipment comments list, click Yes.
If you do not want to allow users to add comments and attachments on closed shipments, in the Shipment comments list, click No.
Click Save.
You can configure whether to include access to comments when sharing shipments via Share Shipment.
Note
Granting access to view comments grants anonymous users permission to view and create comments on the shipment.

You can configure the following options for what to include in reports sent to subscribers. For more information about how to add, view, and add edit subscriptions, see Report Subscriptions.
Include custom properties in shipment reports - you can include any custom properties defined for a shipment in the shipment report. For more information, see Custom Properties.
Include comments in shipment reports - you can include any comments made on a shipment in the shipment report.
Include inspection comments in shipment reports - you can include any comments made during manual inspections of shipment in the shipment report.
Show pending/missing data banner for closed shipments - you can include a banner indicating there is pending/missing data for the shipment.
Notify report subscriber in case of data availability issue - you can configure the system to send report subscribers a separate notification in case of a data availability issue.
Include Excel raw data with reports - you can include the raw data about the shipment in an attachment in Excel file format. This includes all data measurements from all devices assigned to a shipment.
Include PDF raw data with reports - you can include the raw data about the shipment in an attachment in PDF file format. This includes all data measurements from all devices assigned to a shipment.
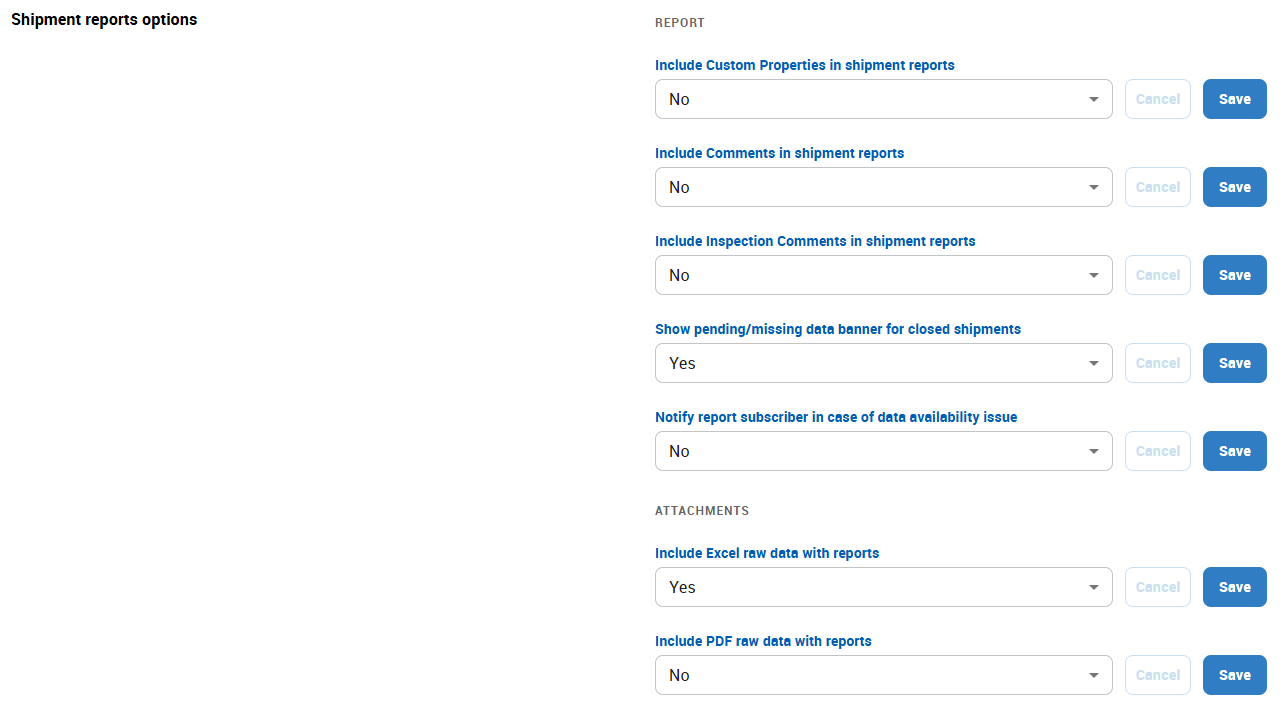
Configuring Shipment Reports Options
In the Settings area, in the Shipment Reports Options area, do one or more of the following:
To configure whether to include custom properties in shipment reports, do one of the following:
If you want to include custom properties, in the Include Custom Properties in shipment reports list, click Yes.
If you do not want to include custom properties, in the Include Custom Properties in shipment reports list, click No.
Click Save.
To configure whether to include comments in shipment reports, do one of the following:
If you want to include comments, in the Include Comments in shipment reports list, click Yes.
If you do not want to include comments, in the Include Comments in shipment reports list, click No.
Click Save.
To configure whether to include inspection comments in shipment reports, do one of the following:
If you want to include inspection comments, in the Include Inspection Comments in shipment reports list, click Yes.
If you do not want to include inspection comments, in the Include Inspection Comments in shipment reports list, click No.
Click Save.
To configure whether to show a pending/missing data banner for closed shipments, do one of the following:
If you want to show a pending/missing data banner, in the Show pending/missing data banner for closed shipments list, click Yes.
If you do not want to show a pending/missing data banner, in the Show pending/missing data banner for closed shipments list, click No.
Click Save.
To configure whether to notify report subscriber in case of data availability issues, do one of the following:
If you want to notify report subscriber in case of data availability issues, in the Notify report subscriber in case of data availability issue list, click Yes.
If you do not want to notify report subscriber in case of data availability issues, in the Notify report subscriber in case of data availability issue list, click No.
Click Save.
To configure whether to include Excel raw data with reports, do one of the following:
If you want to include Excel raw data, in the Include Excel raw data with reports list, click Yes.
If you do not want to include Excel raw data, in the Include Excel raw data with reports list, click No.
Click Save.
To configure whether to include PDF raw data with reports, do one of the following:
If you want to include PDF raw data, in the Include PDF raw data with reports list, click Yes.
If you do not want to include PDF raw data, in the Include PDF raw data with reports list, click No.
Click Save.