User Management
You can use the User Management page to manage users, including the following:
adding users
editing users
activating/ disabling users
changing permission levels for users
see when they last logged in
Note
Currently, this does not include logins via Single sign-on (SSO).
reset passwords for users
Note
This section is only accessible for users with Admin access to the Controlant Platform (SCM).
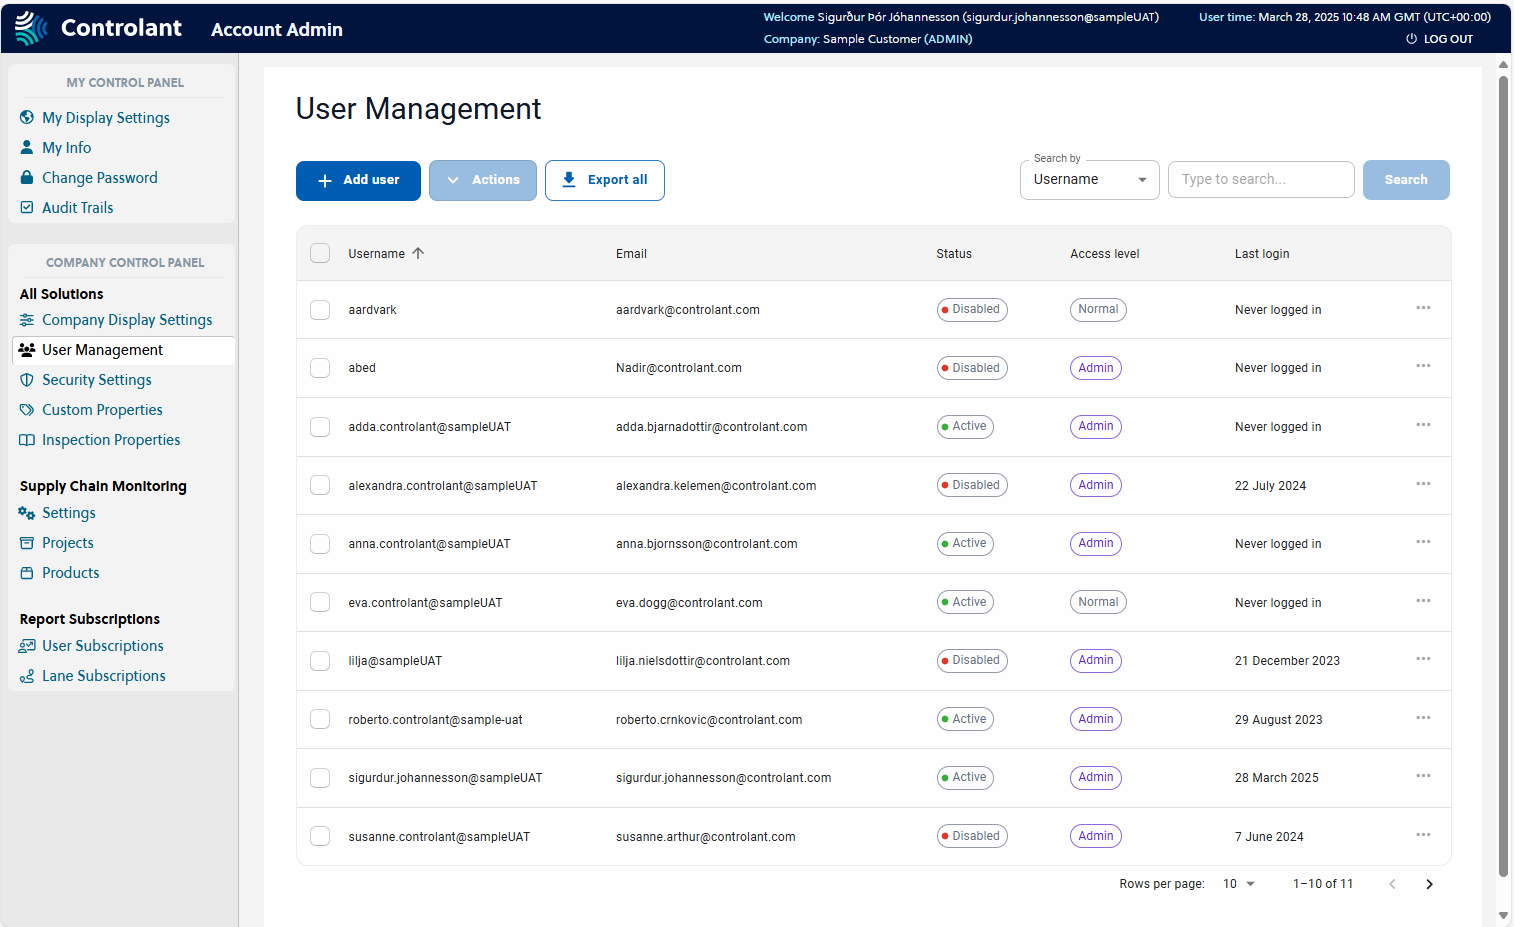
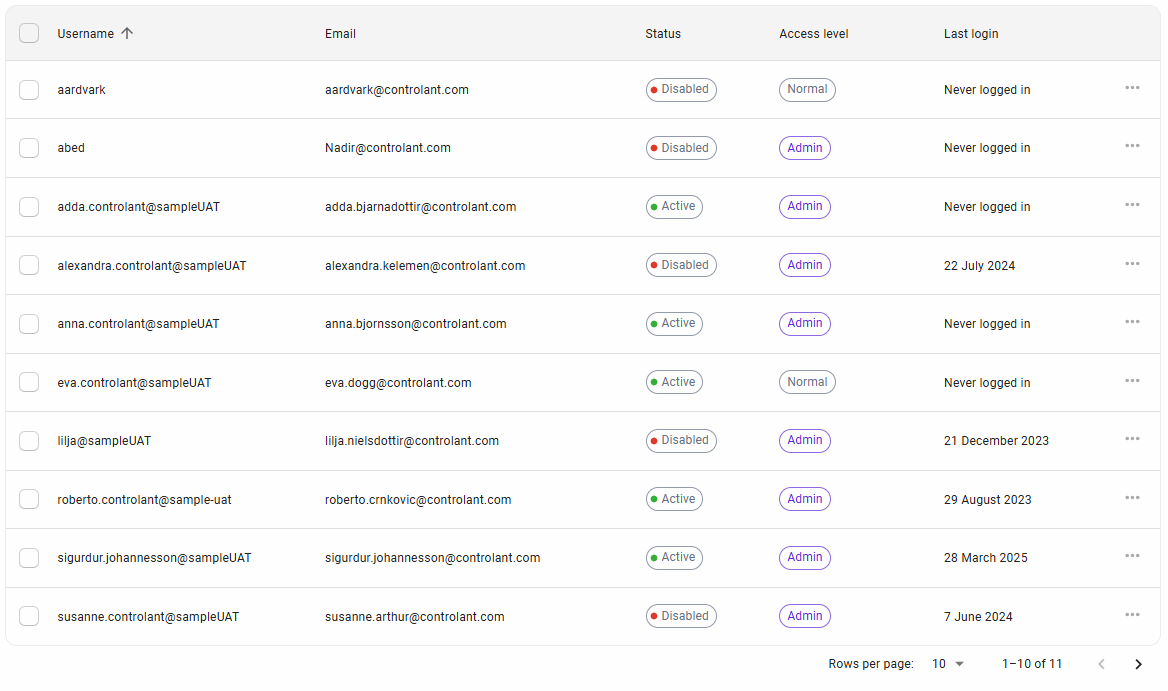
In the Account Admin, in the Company Control Panel menu, in the All Solutions area, click User Management.
The User Management page appears.


Item | Description |
|---|---|
 | Adds a user. |
Actions | Perform an action on selected users:
|
Export selected | Exports a list of selected users. You can select the format to export to:
|
Search conditions | Search condition Select a condition to search or filter by.
|
 | Searches/ filters by the conditions provided. |
Item | Description |
|---|---|
Username | Username of user. |
Email address of user. | |
Status | Status of user:
|
Access level | Access level of user:
|
Last login | Date user last logged in, in For users that have never logged in, this will say NoteCurrently, this does not include logins via Single sign-on (SSO). |
Actions | Actions you can perform on the user. Depending on user status, you will see some of the following options:
|
SCM has the following types of user roles:
Access: Normal users have read-only access to all global shipments, loggers, and global locations. This means they can only view shipments, loggers, locations, projects, project shipments, and project locations to which they have access.
Projects: For specific projects, user must be granted access.
Access: Elevated users have read and write access to all global shipments, loggers, and global locations. This means they can view, edit, and create shipments, locations, projects, project shipments, and project locations to which they have access.
Projects: For specific projects, user must be granted access.
Access: Admin users have read and write access to everything. This means they can view, edit, and create shipments, locations, projects, project shipments, and project locations without restriction.
Projects: Admins can freely create any project-related item.
In the Account Admin, in the Company Control Panel menu, in the All Solutions area, click User Management.
The User Management page appears.
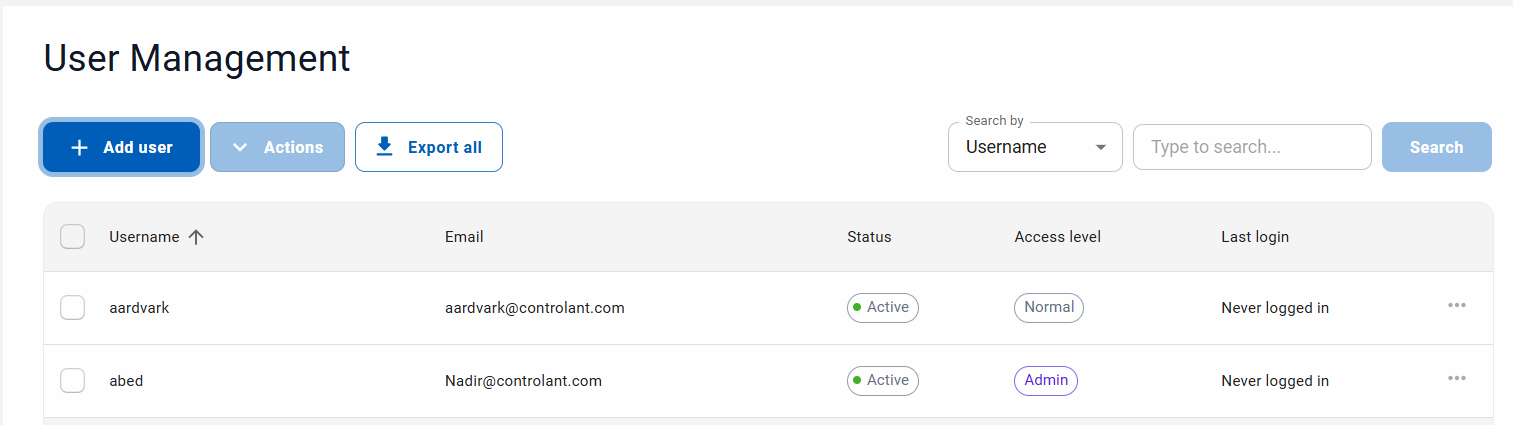
Click Add user.
The Add a user page appears.
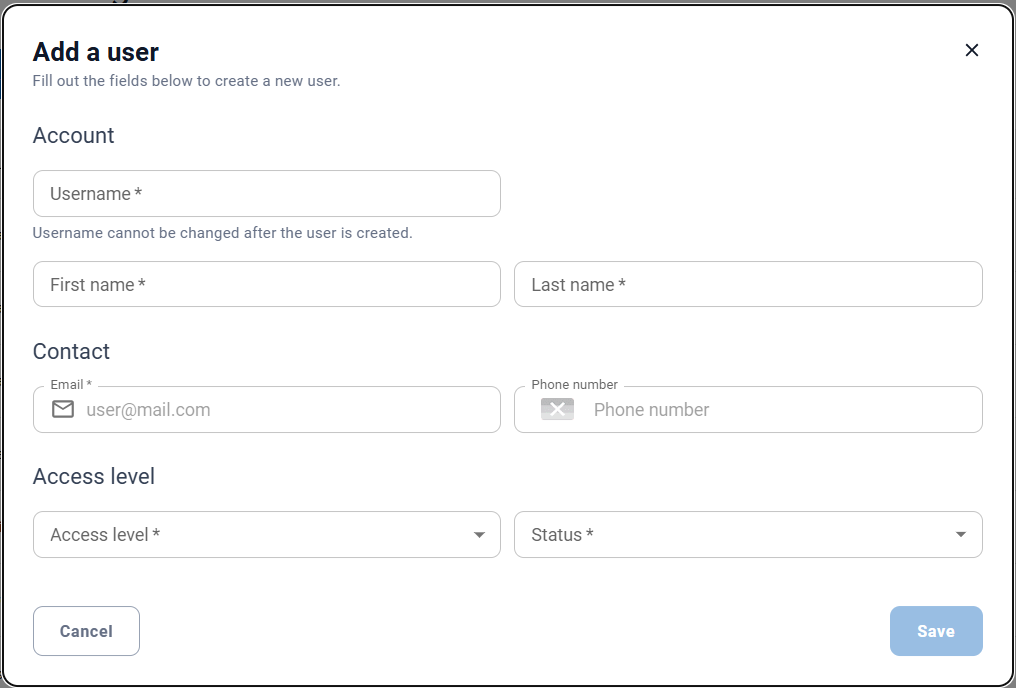
In the Username box, type a username for the user.
In the First Name box, type the first name of the user.
In the Last Name box, type the last name of the user.
In the Email box, type the email address of the user.
If you want to add a phone number for the user, in the Phone number box, type the phone number, in
+[country code [area code] [phone number]formatTo configure the access level of the user, in the Access level box, do one of the following:
To create a user with Admin access level, click Admin.
To create a user with Normal access level, click Normal.
To create a user with Elevated access level, click Elevated.
To configure the status of the user, in the Status box, do one of the following:
To create an active user, click Active.
To create a disabled user, click Disabled.
Click Save.
The User Management page appears, with the new user in the list.
Note
When you create a user, an email is sent to the user's provided email address containing a link to a page where they can create a new password. For security reasons, this link expires after 24 hours. After that, the link stops working, and the user must follow the Request Password Reset process.
Add a user page description
Item | Description |
|---|---|
Username | Username of user. |
First name | First name of user. |
Last name | Last name of user. |
Email address of user. | |
Phone number | Phone number of user, including country code. Leave blank to not register a phone number for user. |
Access level | Access level of user:
|
Status | Status of user:
|
Save | Saves the provided information and creates the user. |
In the Account Admin, in the Company Control Panel menu, in the All Solutions area, click User Management.
The User Management page appears.
If you want to disable a single user, in the User list, locate the user, click
 and click Disable user.
The user status is changed to disabled.
If you want to activate a single user, in the User list, locate the user, click
and click Activate user.The user status is changed to Activated.
If you want enable or activate multiple users, do the following:
In the User list, click to select the users.

If you want to activate the selected users, click
 and click Activate users.
The status of the selected users is changed to Activated.
If you want to disable the selected users, click
and click Disable users.The status of the selected users is changed to Disabled.
You can reset the password for one or more users.
Note
This step is not required if you use Single sign-on to log in.
In the Account Admin, in the Company Control Panel menu, in the All Solutions area, click User Management.
The User Management page appears.
If you want to reset the password for a single user, in the User list, locate the user, click
and click Reset password.The user will receive an email with instructions on how to set a new password.
If you want reset the password for multiple users, do the following:
In the User list, click to select the users.
If you want to activate the selected users, click
and click Reset passwords.The selected users will receive an email with instructions on how to set a new password.
You can export a list of selected users to either a comma separated values file (.csv) or an Excel spreadsheet (.XLSX).
The exported file will contain the following data for all selected users:
username
firstName
lastName
phoneNumber
email
status
lastLogin
Note
Currently, this does not include logins via Single sign-on (SSO).
accessLevel
In the Account Admin, in the Company Control Panel menu, in the All Solutions area, click User Management.
The User Management page appears.
To select the users you want to export, do the following:
If you want to export all users, in the table header, click
.All users in the list are selected.
If you want to export selected users, for each user you want to select, in the User list, click
.
To export the selected users, click
 and do one of the following:
To export the selected users to a comma separated values file (.csv), click .CSV.
To export the selected users to an Excel spreadsheet (.XLSX), click .XLSX.
The download file window appears.
Select what do do with the file.